30+ Arduino Relay Projects: Components, Circuits, Working & Practical Ideas
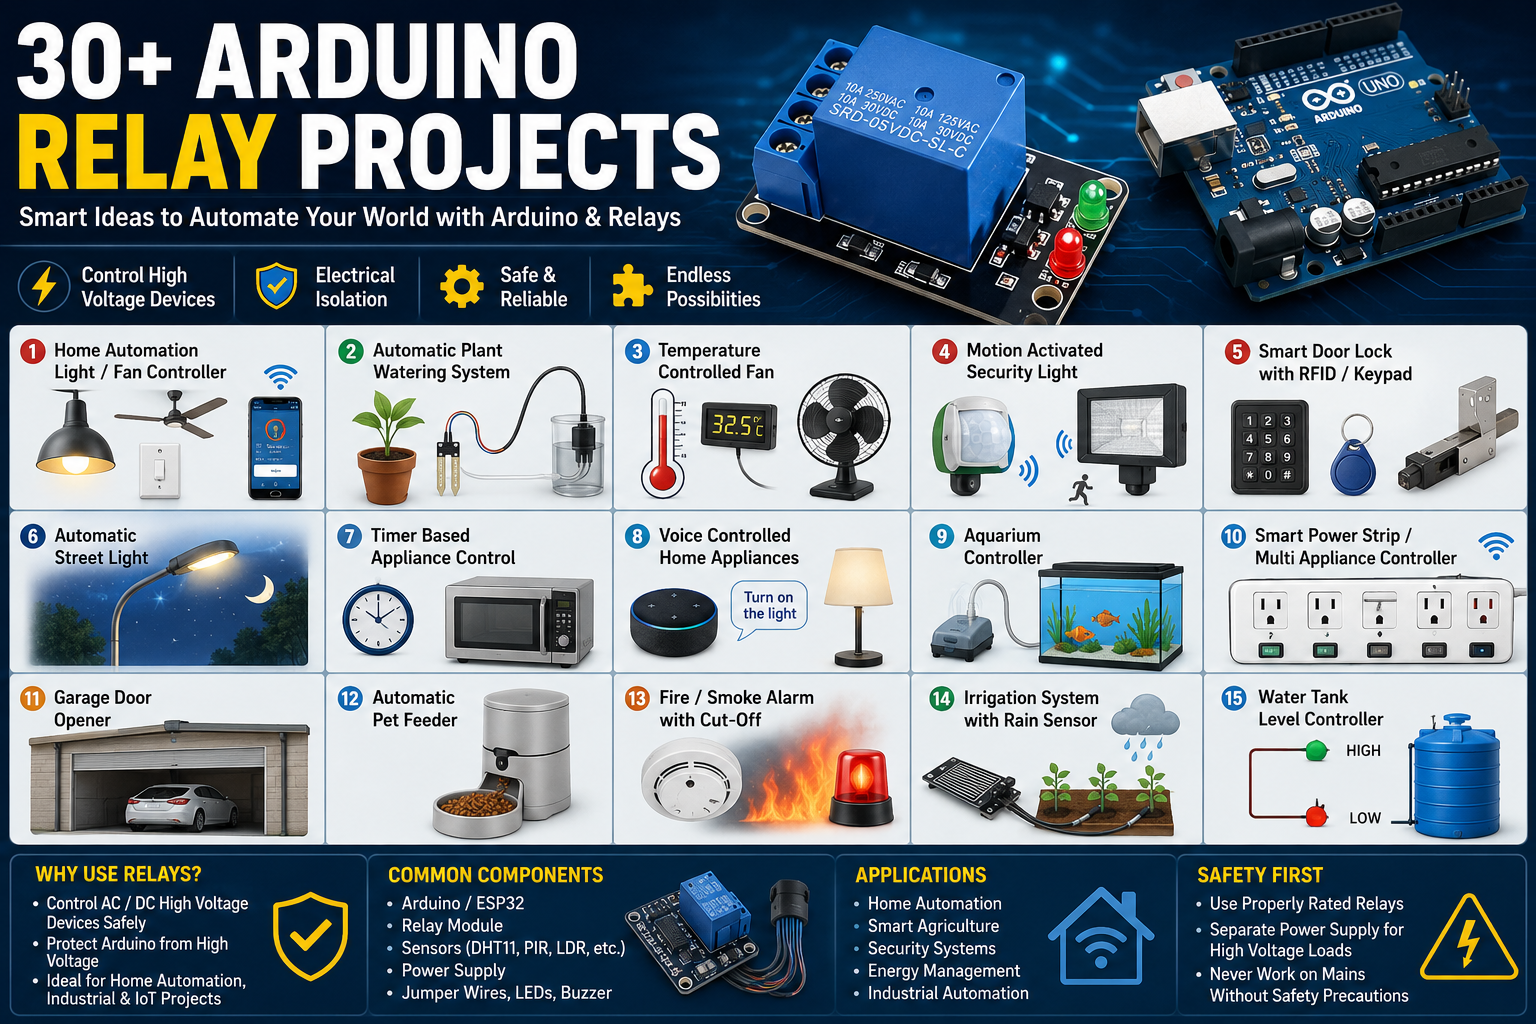
In this guide, we cover 30 practical Arduino relay projects, including the required components, working principles, possible upgrades, applications and difficulty levels.
Arduino boards operate at low voltage, but many relay projects control 230V AC mains appliances. Never connect mains electricity directly to a breadboard or Arduino. Use properly rated relays, fuses, insulated enclosures and suitable wiring. For permanent mains installations, consult a qualified electrician.
What Is a Relay?
A relay is an electrically controlled switch. The Arduino can activate the relay using a low-voltage control signal, while the relay contacts can switch a separate electrical circuit.
Arduino → Relay Module → Electrical Load
Examples of loads include lights, fans, pumps, solenoids and other appropriately rated devices.
Common Relay Types for Arduino Projects
- 1-channel relay module
- 2-channel relay module
- 4-channel relay module
- 8-channel relay module
- 16-channel relay module
- 5V relay module
- 12V relay module
- Optically isolated relay modules
Always check the relay’s actual voltage, current, contact rating and load type before connecting a device.
1. Home Automation Light and Fan Controller
Build a system that controls lights, fans and other appliances using Arduino or ESP32.
Components
- Arduino Uno/Nano or ESP32
- 1-channel or multi-channel relay module
- Push buttons
- LED indicators
- 5V power supply
- Optional Bluetooth HC-05
- Optional ESP8266/ESP32 Wi-Fi
- Optional OLED/LCD display
- Optional temperature sensor
Working
A button, mobile application or sensor sends an input to the Arduino. The Arduino activates the appropriate relay, which switches the connected load.
Possible upgrades: Wi-Fi control, smartphone application, voice control, schedules, energy monitoring and Home Assistant integration.
Difficulty: Intermediate
2. Automatic Plant Watering System
This project automatically waters plants when the soil becomes dry.
Components
- Arduino Uno/Nano
- Capacitive soil moisture sensor
- 5V or 12V water pump
- Relay module
- Water tank
- Water tubing
- External power supply
- Optional water-level sensor
- Optional LCD/OLED
- Optional DHT11/DHT22
Working
The soil moisture sensor sends the moisture level to the Arduino.
Dry soil → Arduino → Relay ON → Pump ON
When sufficient moisture is detected, the Arduino switches the relay and pump OFF.
Possible Upgrades
- Multiple plant zones
- Rain sensor
- Water-level monitoring
- Wi-Fi monitoring
- Automatic watering schedule
- Mobile notifications
Difficulty: Beginner
3. Temperature-Controlled Fan
Components
- Arduino
- DHT11, DHT22 or LM35
- Relay module
- Fan
- LCD/OLED display
- Power supply
Example Logic
- Below 25°C → Fan OFF
- 25–30°C → Fan ON
- Above 35°C → Fan ON and warning
The system can be upgraded with multiple fans, temperature logging and Wi-Fi monitoring.
Difficulty: Beginner
4. Automatic Street Light
Components
- Arduino Nano/Uno
- LDR
- 10K resistor
- Relay module
- LED lamp
- Optional PIR sensor
- Optional RTC DS3231
- External power supply
Working
The LDR measures the surrounding light level.
Dark → Arduino → Relay ON → Street Light ON
Possible upgrades: PIR-based brightness control, solar power, battery backup and automatic scheduling.
Difficulty: Beginner
5. Motion-Activated Security Light
Components
- Arduino
- PIR HC-SR501
- Relay module
- High-power light
- Buzzer
- LED
- Optional LDR
- Optional GSM/Wi-Fi module
Working
When the PIR sensor detects movement, Arduino activates the relay and switches the security light ON.
The light can automatically switch OFF after a programmed delay.
Upgrades: Camera integration, mobile notifications, night-only activation and alarm functionality.
6. Smart Door Lock
Components
- Arduino or ESP32
- RFID RC522
- Keypad
- Relay module
- 12V solenoid or electromagnetic lock
- Buzzer
- Red and green LEDs
- Exit button
- External power supply
Possible Authentication Methods
- RFID card
- PIN keypad
- Bluetooth
- Fingerprint sensor
- Smartphone
- NFC
Advanced features: Access logging, temporary PINs, multiple users and door-open detection.
7. Timer-Based Appliance Controller
Components
- Arduino
- RTC DS3231
- Relay module
- LCD/OLED
- Push buttons
- Buzzer
- Power supply
This project can automatically switch devices according to programmed times.
- Water pump
- Garden lights
- Aquarium lights
- Ventilation
- Signboards
8. Voice-Controlled Home Appliances
Components
- ESP32 or ESP8266
- Relay module
- Wi-Fi connection
- Smartphone
- Optional smart-home platform
Voice commands can be used to control lights, fans, pumps and other compatible loads.
Example: “Turn on the bedroom light.”
9. Aquarium Automation System
Components
- Arduino/ESP32
- RTC DS3231
- Temperature sensor
- Relay module
- Aquarium light
- Air pump
- Heater
- LCD/OLED
- Water-level sensor
Automation
- Automatic aquarium lighting
- Temperature monitoring
- Air pump scheduling
- Low-water warning
Advanced versions can include pH, TDS and water-temperature monitoring.
10. Multi-Appliance Smart Power Controller
Use a multi-channel relay board to control several loads independently.
| Relay | Example Device |
|---|---|
| CH1 | Light |
| CH2 | Fan |
| CH3 | Pump |
| CH4 | Heater |
Components
- ESP32
- 4/8/16-channel relay board
- OLED/LCD
- Push buttons
- Current sensors
- Wi-Fi
- External power supply
Advanced: Add current monitoring to determine how much power each load consumes.
11. Automatic Garage Door Opener
- Arduino/ESP32
- Relay module
- Garage door controller
- Limit switches
- IR obstacle sensor
- Push button
- Buzzer
- Remote receiver
Safety features: Obstacle detection, open/close limit switches, emergency stop and automatic timeout.
12. Automatic Pet Feeder
- Arduino
- RTC DS3231
- Servo or geared motor
- Relay where appropriate
- Food container
- Push button
- LCD
- Buzzer
Possible features include scheduled feeding, manual feeding, portion control and low-food detection.
13. Smoke/Fire Detection With Power Cutoff
- Arduino/ESP32
- Smoke sensor
- Flame sensor
- Buzzer
- Relay
- Exhaust fan
- Warning LED
- Optional GSM/Wi-Fi module
When smoke or another detected hazard exceeds the configured threshold, the system can activate an alarm, ventilation and selected shutdown functions.
14. Automatic Irrigation With Rain Detection
Components
- Arduino
- Soil moisture sensor
- Rain sensor
- Water-level sensor
- Water pump
- Relay
- RTC module
Logic:
Dry soil + no rain + sufficient water = Pump ON
Wet soil OR rain = Pump OFF
15. Automatic Water Tank Pump Controller
Components
- Arduino
- Float switches or water-level sensors
- Relay/contact switching device
- Water pump
- Buzzer
- LED indicators
- LCD
Basic Logic
Tank LOW → Pump ON
Tank FULL → Pump OFF
Advanced versions can include dry-run protection, overflow warnings and Wi-Fi notifications.
16. Automatic Sump Pump Controller
Detect unwanted water and automatically activate a pump.
Possible Sensors
- Float switch
- Water-level sensor
- Conductive water probes
Applications: Underground tanks, drainage systems, rainwater collection and basement water removal.
17. Refrigerator Temperature Monitor
- Arduino/ESP32
- DS18B20 temperature sensor
- LCD/OLED
- Buzzer
- Door sensor
- Optional relay/control interface
The project can monitor temperature and generate alerts when the temperature becomes too high or the door remains open.
For actual refrigeration equipment, use properly designed compressor control hardware rather than directly switching a compressor with a hobby relay.
18. Automatic Exhaust Fan Controller
- Arduino
- DHT22 or humidity sensor
- Relay module
- Exhaust fan
- Optional display
Example: Humidity above 70% → Exhaust fan ON.
Useful for bathrooms, kitchens, workshops and greenhouses.
19. Greenhouse Automation
Sensors
- Temperature sensor
- Humidity sensor
- Soil moisture sensor
- LDR
- Rain sensor
- Water-level sensor
Relay-Controlled Devices
- Water pump
- Exhaust fan
- Grow light
- Humidifier
- Heater
- Ventilation
An ESP32 is particularly useful because it provides Wi-Fi for remote monitoring.
20. Solar Battery Monitoring and Load Controller
Components
- Arduino/ESP32
- Voltage sensor
- Current sensor
- Appropriate switching device
- Solar panel
- Battery
- Load
- LCD/OLED
Possible functions include battery voltage monitoring, low-voltage load cutoff, warnings and automatic load switching.
21. Automatic Night Lamp
- Arduino Nano
- LDR
- Relay
- LED lamp
- Optional PIR sensor
Dark + motion detected → Light ON
This can reduce unnecessary energy consumption.
22. Smart Bathroom Automation
Components
- PIR sensor
- LDR
- Humidity sensor
- Arduino/ESP32
- Relay module
- Light
- Exhaust fan
Example Logic
Person detected + dark → Light ON
High humidity → Exhaust ON
No motion for programmed time → Light OFF
23. Kitchen Gas/Smoke Safety System
- Arduino/ESP32
- Gas sensor
- Smoke sensor
- Buzzer
- Relay
- Exhaust fan
- Warning LED
- Optional GSM/Wi-Fi
Possible actions include sounding an alarm, activating ventilation and switching off selected equipment.
Note: Use certified gas detectors and professionally rated gas shutoff equipment for real safety installations.
24. Automatic Classroom Controller
Inputs
- PIR sensor
- LDR
- Temperature sensor
Outputs
- Lights
- Fans
- Projector power interface
- Exhaust fan
The system can automatically switch lights and fans based on occupancy, brightness and temperature.
25. Smart Office Automation
- ESP32
- PIR sensor
- LDR
- DHT22
- Relay board
- OLED display
- Wi-Fi
Control lights, fans, ventilation and other compatible equipment while monitoring environmental conditions.
26. Server Room Temperature Protection
Components
- ESP32
- Multiple temperature sensors
- Relay/control interface
- Exhaust fan
- Buzzer
- OLED display
- Wi-Fi
Possible Actions
- Detect high temperature.
- Turn on additional ventilation.
- Activate an alarm.
- Send a notification.
- Disconnect selected non-essential loads where appropriate.
27. Automatic Poultry or Farm Shed Controller
Monitor
- Temperature
- Humidity
- Light
- Water level
Control
- Fans
- Lights
- Water pumps
- Heating equipment
- Ventilation
This can be developed into a complete IoT-based agricultural automation project.
28. Automatic School Bell
Components
- Arduino
- RTC DS3231
- Relay/control interface
- Electric bell/buzzer
- LCD
- Push buttons
Program different bell times for classes, lunch breaks, assembly and school closing.
29. Washing Machine Automation Prototype
Possible Components
- Arduino
- Water-level sensor
- Flow sensor
- Relay/control interface
- Water inlet valve/pump
- Drain pump
- Buzzer
Example Sequence
Fill → Wash → Drain → Repeat → Finish
This is best treated as an educational prototype. Real washing machines require properly rated switching, isolation and safety controls.
30. Smart Energy Saver
This project combines several sensors to reduce unnecessary energy consumption.
Sensors
- PIR motion sensor
- LDR
- Current sensor
- Temperature sensor
Outputs
- Lights
- Fans
- Pumps
- Other compatible loads
The system can determine whether a room is occupied and automatically switch unnecessary equipment OFF.
Recommended Components for Arduino Relay Projects
Controller Boards
- Arduino Uno
- Arduino Nano
- Arduino Mega
- ESP8266
- ESP32
Sensors
- LDR
- PIR HC-SR501
- DHT11
- DHT22
- DS18B20
- LM35
- Capacitive soil moisture sensor
- Rain sensor
- Water-level sensor
- Float switch
- Gas/smoke sensor
- Flame sensor
- IR sensor
- Ultrasonic HC-SR04
- Current sensor
- Voltage sensor
Displays
- 16×2 LCD
- 20×4 LCD
- 0.96-inch OLED
- TFT display
Communication Modules
- HC-05 Bluetooth
- ESP8266 Wi-Fi
- ESP32 Wi-Fi/Bluetooth
- GSM module
- RFID RC522
- LoRa module
Actuators
- DC water pump
- Servo motor
- DC motor
- Solenoid
- Electromagnetic lock
- Fan
- Buzzer
- LED lamp
- Exhaust fan
Supporting Components
- Resistors
- LEDs
- Push buttons
- Transistors
- MOSFETs
- Diodes
- Terminal blocks
- Breadboard
- Jumper wires
- Fuses and fuse holders
- Project enclosure
- 5V/12V DC power supplies
- Buck converters
- Screw terminals
Arduino Relay Project Difficulty Levels
| Level | Recommended Projects |
|---|---|
| Beginner | Street light, night lamp, timer, plant watering |
| Intermediate | Temperature fan, aquarium controller, water tank controller |
| Advanced | Smart home, greenhouse, garage door, energy monitoring |
| Professional Prototype | Farm automation, server-room monitoring, multi-zone irrigation and industrial monitoring |
How to Choose the Right Relay
Do not select a relay only by looking at the advertised current number. Consider:
- Control voltage
- Coil voltage
- Contact voltage
- Contact current
- AC or DC load
- Resistive or inductive load
- Motor starting current
- Isolation requirements
- Number of channels
- Enclosure and environmental conditions
Motors, pumps, compressors and other inductive loads can have high starting currents, so their switching requirements can be very different from those of a simple resistive lamp.
Relay Project Architecture
↓
Arduino / ESP32
↓
Relay Driver / Relay Module
↓
Appropriately Rated Switching Device
↓
Electrical Load
Safety Rules for Relay Projects
⚠️ Read Before Working With AC Mains
- Never experiment with 230V AC on a breadboard.
- Never connect mains wires directly to Arduino GPIO pins.
- Use a properly rated relay or contactor.
- Use appropriate fuses and circuit protection.
- Use insulated enclosures.
- Keep low-voltage and mains wiring physically separated.
- Use suitable wire sizes and terminals.
- Provide strain relief for cables.
- Never touch exposed mains wiring while powered.
- Disconnect power before modifying the circuit.
- For permanent installations, use a qualified electrician.
Best Arduino Relay Projects for Students
- Automatic Plant Watering System
- Automatic Street Light
- Temperature-Controlled Fan
- Automatic Water Tank Controller
- Smart Door Lock
- Smart Home Automation
- Greenhouse Automation
- Automatic School Bell
- Smart Energy Saver
- Aquarium Automation
Best Advanced Arduino Relay Projects
- ESP32 Smart Home Automation
- IoT Greenhouse
- Smart Farm Automation
- Multi-Zone Irrigation
- Energy Monitoring System
- Server Room Environmental Monitoring
- Smart Office Automation
- Multi-Appliance Controller
Conclusion
Arduino relay projects are an excellent way to learn how sensors, microcontrollers and real-world electrical devices can work together. Starting with a simple project such as an automatic street light or plant watering system, you can gradually progress toward IoT-based home automation, greenhouse control, smart farming and energy-management systems.
The most important principle is to separate the low-voltage Arduino control system from the higher-voltage load circuit and use properly rated hardware throughout the project.
Start with low-voltage DC projects first, learn how the relay module works, and only then move toward professionally installed AC applications.